
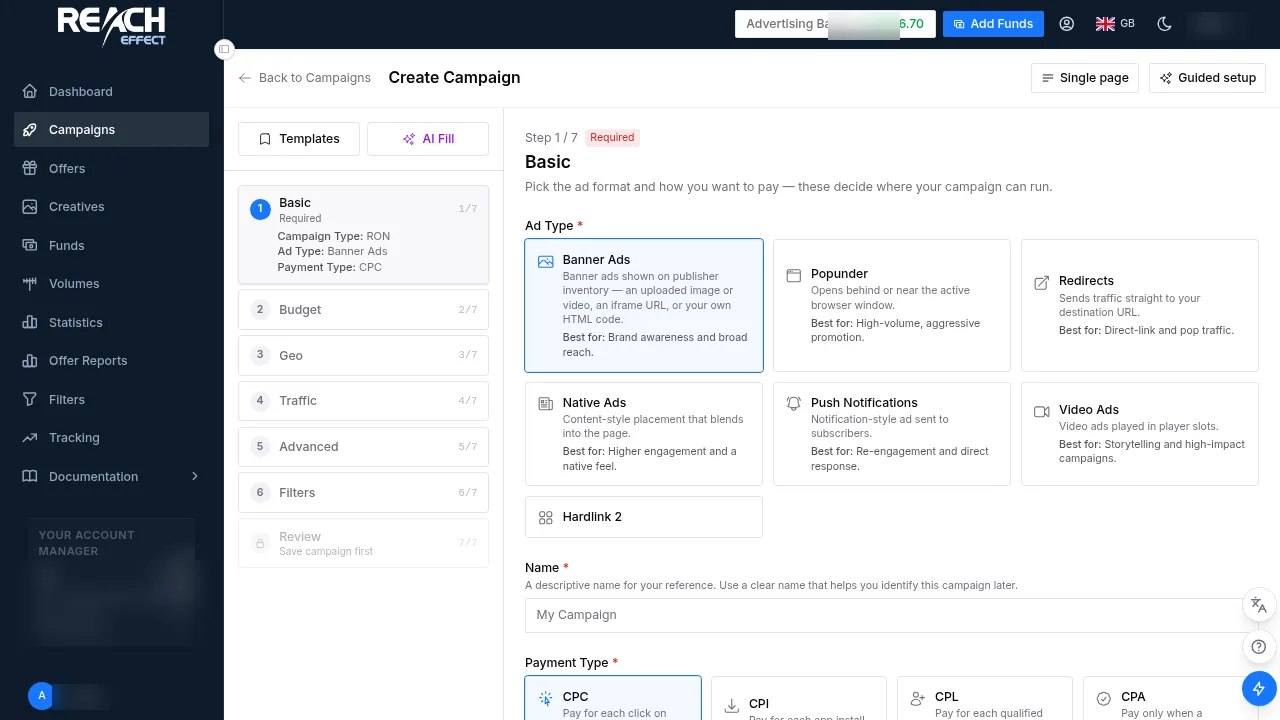
The seven steps
| Step | What you set |
|---|---|
| 1 · Basic | Campaign name; Ad Type card (Banner Ads, Popunder, Redirects, Native Ads, Push Notifications, In-page push, Video Ads); Payment Type (CPM for impression-priced formats; CPC, CPI, CPL or CPA where offered); optional category and group. |
| 2 · Budget | Daily budget with optional Budget Spreading (even pacing through the day), the default bid, optional daily impression or click caps, and an optional total campaign budget. |
| 3 · Geo | Countries from a tier shortcut or the continent → country → region → city tree. Empty means worldwide. Bids can later be set per country on each ad. |
| 4 · Traffic | Device type, operating systems, browsers, connection type, carrier, browser and site language. Empty means any. |
| 5 · Advanced | Schedule (days and hours), frequency capping, and include or exclude lists of domains, source IDs and sub-IDs. |
| 6 · Filters | Attach saved filters: domain, source and sub-ID lists, ISP excludes and IP pools you built under Filters, reusable across campaigns. |
| 7 · Review | A summary of every setting. The review flags anything missing or likely to limit delivery: no ads, a bid under the GEO minimum, very narrow targeting. |
Add the ads
After saving, open the campaign's Ads tab (or add them during the form). Popunder and redirect campaigns need only a destination URL; push, in-page push, native, banner and video need a creative within the specifications. Add the click-ID macro to the destination URL now if you track conversions: ?cid={tracking}, as described in Postback setup.
Review and go live
A saved campaign enters Pending approval while the moderation team checks the creatives and landing page against the advertising policies, normally within one business day. It then shows Active and starts spending, or Rejected with a reason you can fix and resubmit. Campaigns only serve while the balance is positive and the daily budget has room.
What to do in the first days
- Start wide and let the first data arrive before you narrow; over-targeting on day one starves a campaign.
- Open Statistics grouped by source ID after a day or two, and move the sources that spend without converting into an exclude list.
- Save a configuration that works as a template; the next launch is then a GEO change away.
Full guide inside your account. Every option on this page, with screenshots of each screen, is documented in the platform under Documentation → Creating a Campaign after you log in.